In this post, I will briefly define supervised fine-tuning of large language models (LLMs), prepare a dataset for Google Vertex AI collected from social media posts, and use Vertex AI to train Google’s LLM, Gemini to analyze the sentiment.
This is a purely no-code blog post. I will demonstrate everything directly from the Google Cloud Console using Vertex AI.
Introduction
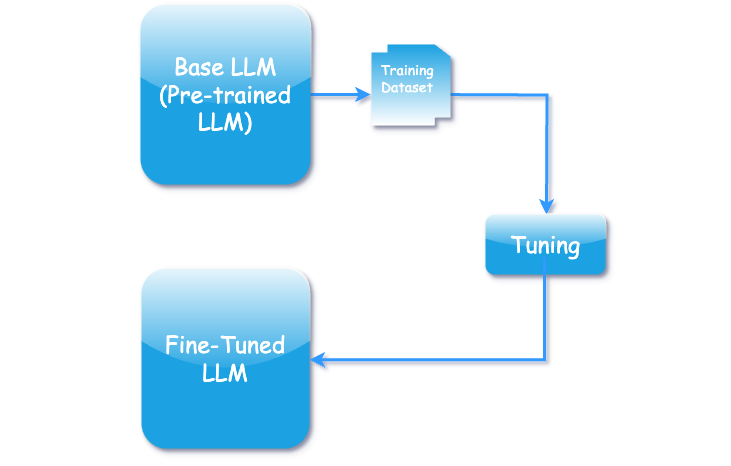
Fine-tuning a large language model (LLM) is the process of further training a pre-trained model to perform a specific task or work with a particular dataset. The dataset is often smaller and more specialized (e.g., sentiment analysis, medical language processing). So that the model can perform specific tasks with greater precision and accuracy.
In short, we can say that fine-tuning involves teaching a pre-trained model new skills so that it can perform specific tasks with greater precision and accuracy.
Fine-tuning allows businesses and developers to leverage LLMs for tailored applications with greater accuracy.
Supervised Fine-tuning
Supervised fine-tuning is the process of refining a pre-trained model using labeled data, where the model is trained with specific, clear inputs and known, correct outputs.
An example of labeled data involves specifying both inputs and their corresponding desired outputs. For instance, in sentiment analysis, the input might be a sentence, and the output would be a label such as “positive” or “negative.”
Supervised fine-tuning is one of the supported tuning methods in Vertex AI.
Prepare supervised fine-tuning data for Gemini models
Training dataset need to be prepared to provide it to the Gemini models. As per google documentation ,a training dataset must include a minimum of 16 examples. For best results, it is recommend that we should provide at least 100 to 500 examples. The more examples you provide in your dataset, the better the results. But, there is no limit for the number of examples in a training dataset.
Dataset must be in the JSON Lines (JSONL) format, where each line contains a single tuning example.
Every line in JSON file has message object or field consists of an array of role-content
pairs and the role is set to either system, user, or model
The training dataset will look like below snippet. I have formatted the JSON for readability, but in reality, it needs to be a single line. Check GitHub file for real example: https://github.com/dev-scripts/dataset/blob/main/gemini_pro_peft_train_sample_1.jsonl. In this file have collected 527 social media post to analyze the sentiment.
I will explain how the role are used to train the model.
system role
Role system provides instructions or context to guide the model’s behavior.
This role sets up the rules for how the model should interpret the subsequent messages or queries.
Example:
you can find the training dataset used for this blog post in GitHub repo, which has dataset with clear input and clear expected output form model. https://github.com/dev-scripts/dataset/blob/main/gemini_pro_peft_train_sample_1.jsonl
user role
The role users represents the input from the end-user or application. This role simulates user interaction.
Example:
model role
The model role contains the expected output or responses from the model.
Example:
Fine Tuning Large Language Models (LLMs) With Vertex AI
I will show you the steps to fine tune the Google Gemini model with Vertex AI.
1. Login to Google Cloud
Since I am demonstrating from the Google Cloud Console, you will need to login to your Google Cloud account or need to signup if you don’t Google Cloud account. here is the link cloud.google.com. For this demonstration I have set up a branch new account.
2. Setup Billing
If you haven’t set up billing, you’ll need to add your payment details so Google can charge you accordingly. If you’re a new user on the Google Cloud Platform, you’ll get a 90-day free trial with $300 USD in credit, which will be more than enough to try out Gemini for our demonstration.
If you exceed your credit limit or your credit has expired, you will incur charges. Please be mindful of the costs.
3. Create Project
Go to your Google Cloud Console https://console.cloud.google.com and then create new google project clicking one red box 1 which will open red box popup and click on red box 2.

Give the name to the Google project form red box 3.
You can also see the project ID just below the project name text box; this ID cannot be changed in the future. You can leave the location set to the default.
 .
After you hit a save button it will take few seconds to create a project.
.
After you hit a save button it will take few seconds to create a project.
4. Enable APIs & Services
To enable APIs & Services first you need to go to red box 4 and click on red box 5
 Now you are inside a project dashboard. Search for “Enable APIs & Services” form search text box (Red box 6) and click on Enable APIs & Services (Red box 7)
 Click on + ENABLE APIS AND SERVICES (Red Box 8)
 Search for
 Vertex AI API and click on Vertex AI API (Red Box 9)
 Click on
 Vertex AI API text (Red Box 10)
 Click on enable button (Red Box 11) You may be asked for billing information if you haven’t submitted it already.
 It will take coupe of seconds to enable the
 Vertex AI API.
Once the Vertex API is enabled, your browser window will display the screen shown below.

5. Steps to Fine Tuning Gemini With Vertex AI
Now let’s go to the Vertex AI studio.
Search for Vertex AI and click on Vertex AI (Red Box 12).

Once you click on Vertex AI, you will see a menu on the left side, where you can also find Tuning. Click on Tuning (Red Box 13).
 You will be redirected to the screen below after clicking the Tuning menu, where you need to click +Create tuned Model
 +Create tuned Model link will redirect to below screen.

In above screen you will be providing the details for the model to be tuned.
- Choose the tuning method, here I am choosing supervise tuning.
- Give the name of the tuned model. This will be displayed in freeform model dropdown after tuning is completed.
- Choose a base model to fine tune. I am choosing
gemini-1.0-pro-002
I will keep the rest of the settings at their default.
Once you have completed everything on the screen above, you can click Continue (red box 20), which will redirect you to the screen below, where you will upload the dataset in JSONL format. The file needs to be uploaded to a GCP cloud storage. You can either use an existing file from cloud storage or upload a new one to GCP cloud storage. In this case, I am using an already uploaded file.
You can find the training data used for this blog post in GitHub repo: https://github.com/dev-scripts/dataset/blob/main/gemini_pro_peft_train_sample_1.jsonl
Once you complete all the steps, click on start tuning button.

Here’s the corrected sentence:
Once you hit the Start Tuning button, you can go and grab a coffee, as it will take some time to validate the dataset, place it in the queue for tuning and processing the job.
Once tuning job is completed, you can see the tuned model in the list with Succeeded status.

Test Tuned Model
To test the tuned model, you can click on freeform menu (red box 24) and choose the recently tuned model from dropdown (red box 25).

I am choosing recently tuned model Fine Tune Test form dropdown and keep rest setting default.

The model was tuned to understand the sentiment form the given text. So, here we are testing with text with negative sentiment.
Prompt : Text: Traffic was terrible this morning. and the response should be Sentiment: Negative
Let’s see the rest result in below screen.

Congratulations! Your model has been tuned to understand the sentiment from the text, and the response is also in the desired format.
You can also adjust the temperature to get the desired output.
In this post, we learned how to fine-tune Google’s large language model (LLM) Gemini using supervised learning method with Vertex AI.
This post includes steps for setting up your Google Cloud project, preparing the training dataset, train a new model (customize) using a base model, and testing the trained model using Vertex AI.